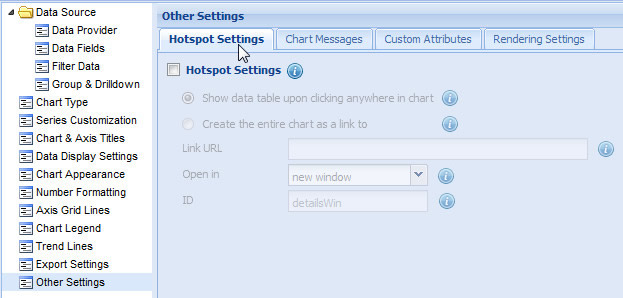
You can configure the entire chart to act as a hot spot. On clicking anywhere on the chart, you can view more information about the chart data, either in a tabular format or in an external file.
- Select the Hotspot Settings check box.
An entire chart can be configured to act as a hot spot in two ways:
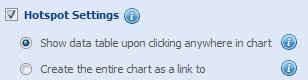
Display data table upon clicking anywhere in the chart
You can view the chart data in a tabular format by clicking anywhere on the chart. By default, this feature is enabled when you configure the entire chart to act as a hot spot.
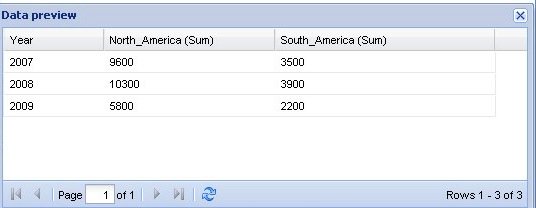
- Select the Show data table upon clicking anywhere in chart check box. The chart data will appear in a table, as shown below:
You can also open a Web Page by clicking anywhere on the chart.
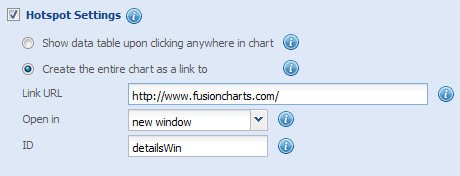
- Select the Create the entire chart as a link to check box.
You need to specify the following information to link the entire chart to a Web Page:
- Link URL: In the Link URL text box, enter the location of the Web Page.
- Open in: You can specify the target window of the external link, that is, whether the Web Page will open in a new page, a pop-up window or in a frameset.
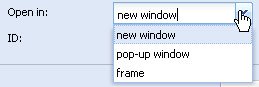
- In the Open in list, select the appropriate target window.
- In the ID text box, enter the ID of the target window, if the Web Page opens in a pop-up window or in a frame.
If you have specified the target window as a pop-up window, you can customize the appearance and available features of the pop-up window.
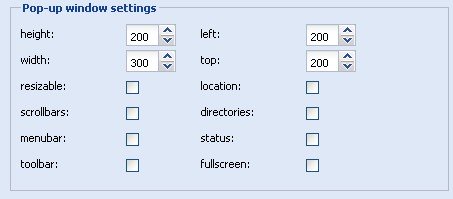
- Height: You can specify the height of the pop-up window in pixels.
- In the height up and down box, click the up and down arrows to increase or decrease the height of the pop-up window. Alternatively, you can also enter the appropriate height.
- Width: You can set the width of the pop-up window in pixels.
- In the width up and down box, click the up and down arrows to increase or decrease the width of the pop-up window. Alternatively, you can also enter the appropriate width.
- Resizable: You can manually resize the pop-up window by dragging the edges of the pop-up window.
- Select the resizable check box to enable manual resizing of the pop-up window.
- Scrollbars: You can display or hide the horizontal and vertical scrollbars that normally appear when the page content is larger than the screen.
- Select the Scrollbars checkbox to display the scrollbars.
- Menu bar: Select the menubar check box to display a menu bar at the top of the pop-up window
- Toolbar: You can display the main toolbar, with the back, forward, stop buttons.
- Select the Toolbar checkbox to display the various toolbars.
- Left: You can specify the distance of the pop-window from the left edge of the screen.
- In the left up and down box, click the up and down arrows to increase or decrease the distance of the pop-up window from the left edge of the screen. Alternatively, you can also enter the appropriate distance in the left up and down box.
- Top: You can set the distance of the pop-window from the top edge of the screen.
- In the top up and down box, click the up and down arrows to increase or decrease the distance of the pop-up window from the top edge of the screen. Alternatively, you can also enter the appropriate distance in the top up and down box.
- Location: You can display the location bar. A location bar is the address bar you can type and view the URLs.
- Select the location checkbox to display the location bar.
- Directories: You can display or hide any additional toolbar, like the links bar in Internet Explorer.
- Select the directories checkbox to display the additional toolbars.
- Status: Select the status checkbox to display the status bar at the bottom of the pop-up window.
- Full screen: Select the Fullscreen checkbox to open the pop-up window in full-screen mode.