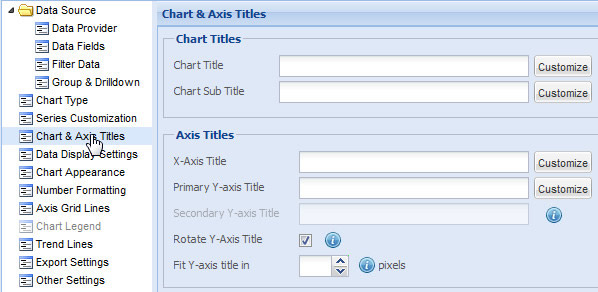
Collabion Charts for SharePoint allows you to add a heading and sub-heading to the specified chart. The heading and sub-heading provide a basic overview of information present in the chart. You can also set titles for the X-Axis and Y-Axis.
Learn how to:
- Set Chart Title and Sub Title
- Customize the Chart Title and Sub Title
- Set Axes Titles
- Customize the Axes Titles
- Rotate Y-Axis title
To specify the chart title and sub title follow the steps given below:
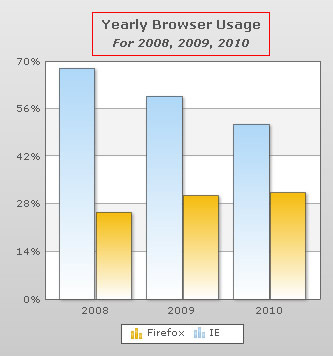
- To display the main heading for the chart enter the desired title in the Chart Title text box. The chart title appears at the top of the chart.

- To display the sub heading enter the desired sub title for the chart in the Chart Sub Title text box. The chart sub title appears below the chart title.

- Click Preview to view the changes made.
A chart with title and sub title will look as under:
Note:
Click Apply to apply the changes.
Click Revert to undo the changes made.
Customize the Chart Title and Sub Title
You can add styles and effects to the chart title and sub title. Click the Customize button beside the respective text boxes. The Customize Styles dialog box window that will open, allows you to do the following:
- Apply animation
- Change the font type, font size, etc.
- Apply Blur effect
- Apply Bevel effect
- Apply Glow effect
- Apply shadow
You can add titles for both the axes (X-Axis and Y-Axis).
Note: In Combination dual Y-axis charts there are two Y-Axes: Primary and Secondary.
To specify the axes titles follow the steps given below:
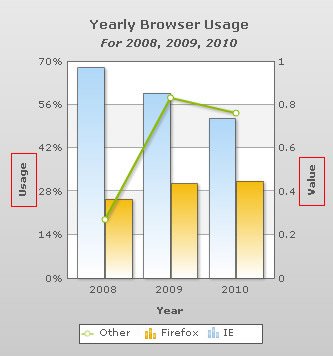
- To specify the X-Axis title, enter the intended name in the X-Axis Title text box. . The X-Axis title is displayed below the X-Axis labels.

- To specify the primary Y-Axis title, enter the intended name in the Primary Y-axis Title text box. By default, the primary Y-Axis title appears on the left side of the chart.

- To specify the secondary Y-Axis title, enter the appropriate name in the Secondary Y-axis Title text box. Secondary Y-Axis is applicable in dual Y-Axis charts only. By default, the secondary Y-Axis title appears on the right side of the chart.

- Click Preview to view the changes made.
A chart with the axes titles looks as under:

Note:
Click Apply to apply the changes.
Click Revert to undo the changes made.
You can add styles and effects to the axes titles. Click the Customize button beside the respective text boxes. The Customize Styles dialog box window that will open, allows you to do the following:
- Apply animation
- Change the font type, font size, etc.
- Apply Blur effect
- Apply Bevel effect
- Apply Glow effect
- Apply shadow effect
The Y-Axis title, by default, appears horizontally. If you want to rotate the Y-Axis title vertically, you need to select the Rotate Y-Axis Title check box. Click Preview to view the change made.
A vertically rotated Y-Axis title consumes less space on the left margin of the chart.
![]()
A chart with rotated Y-Axis title looks as under:
Note:
Click Apply to apply the change.
Click Revert to undo the change made.